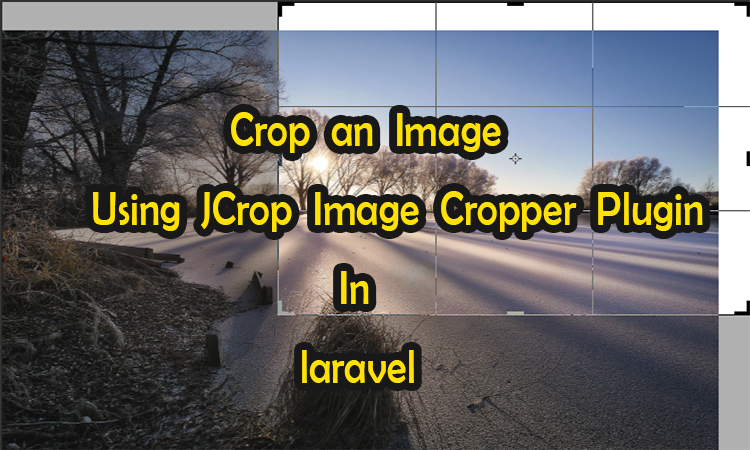
Today in this tutorial we are going to see how to crop an image in laravel using jcrop image cropper plugin which was first made by deep liquid to crop an image. It is super easy and you can integrate in your website to easily crop and save image.
We are going to use Valums (Andres Valums) ajax upload plugin which is used to upload images or files directly to the server and integrate it into jcrop image plugin to crop and save.
Checkout: How to Crop an Image Before Upload & Save [Cropper JS]
Lets get started.
I assume that you have clean and fresh install of Laravel already in your machine so that you can follow step by step to see how to integrate jcrop in Laravel without any problem.
We are going to need image intervention package in order to proceed so first install that package using composer require intervention/image.
While back I have written Laravel Resize Image On the Fly Using PHP GD Library & Intervention Image, where i have used intervention image package to resize images, you can take the reference of it and proceed.
Step 1: Preparing the necessary files
We are going to use jcrop and valums ajax upload plugin in order to proceed. Andres Valums have already took out ajax upload v2 plugin and taken down earlier version. So download those files from below.
- Download AjaxUpload plugin from here.
(I have made this plugin Laravel compatible so, you need to use this in order to get this thing to work).
- Download the jcrop from its official website here.
Extract the jcrop archive files inside Laravel public folder and also place upload.js inside jcrop folder you just extracted. Now your folder structure should look like this.

Step 2: Writing the code
Create new file in resources/views folder called index.blade.php and paste the code below. Remember we are using bootstrap in order to quickly built up the form so, you may need to download bootstrap and place it in your public folder as well.
|
1 |
<link rel="stylesheet" href="{{ url('jcrop') }}/jquery.Jcrop.min.css"> |
|
1 2 |
<script src="{{ url('jcrop') }}/upload.js"></script> <script src="{{ url('jcrop') }}/jquery.Jcrop.min.js"></script> |
|
1 2 3 4 5 6 7 8 9 10 11 12 13 14 15 16 17 18 19 20 |
<div class="container" style="margin-top: 30px;"> <h1 class="text-center">JCrop Image Upload Tutorial</h1> <div class="row" style="border:1px solid #ccc; padding: 10px;"> <div class="col-md-5"> <div class="form-group"> <button class="btn btn-primary btn-sm" id="upload">Browse</button> <button class="btn btn-warning btn-sm" id="crop" data-toggle="modal" data-target="#modal-default">Crop</button> </div> </div> <div class="col-md-7"> <input type="hidden" name="image" class="image_name"> <div class="img-holder-slider"></div> <!-- Coordinates --> <input type="hidden" name="x" class="x" value="0" /> <input type="hidden" name="y" class="y" value="0" /> <input type="hidden" name="w" class="w" value="700" /> <input type="hidden" name="h" class="h" value="180" /> </div> </div> </div> |
|
1 2 3 4 5 6 7 8 9 10 11 12 13 14 15 16 17 18 19 20 |
<div class="modal fade" id="modal-default"> <div class="modal-dialog"> <div class="modal-content"> <div class="modal-header"> <button type="button" class="close" data-dismiss="modal" aria-label="Close"> <span aria-hidden="true">×</span> </button> <h4 class="modal-title">Crop Image</h4> </div> <div class="modal-body" id="toCrop" style="padding: 0!important;"></div> <div class="modal-footer"> <button type="button" class="btn btn-default pull-left" data-dismiss="modal">Close</button> <button type="button" class="btn btn-primary" id="saveImage">Save Image</button> </div> </div> <!-- /.modal-content --> </div> <!-- /.modal-dialog --> </div> <!-- /.modal --> |
– Give it a style.
|
1 2 3 4 5 6 7 8 9 10 11 12 13 |
.img-holder-slider { border:1px solid #efefef; background-color: #ddd; min-height: 144px; } .img-holder-slider img { width: 100%; } .jcrop-keymgr { display: hidden !important; } |
Now paste the javascript code below :-
|
1 2 3 4 5 6 7 8 9 10 11 12 13 14 15 16 17 18 19 20 21 22 23 24 25 26 27 28 29 30 31 32 33 34 35 36 37 38 39 40 41 42 43 44 45 46 47 48 49 50 51 52 53 54 55 56 57 58 59 60 61 62 63 64 65 66 67 68 69 70 71 72 73 74 75 76 77 78 79 80 81 82 83 84 85 86 87 |
$.ajaxSetup({ headers: { 'X-CSRF-TOKEN': $('meta[name="_token"]').attr('content') } }); function showCoords(c) { $('.x').val(c.x); $('.y').val(c.y); $('.w').val(c.w); $('.h').val(c.h); } function initiate_ajax_upload(button_id) { //alert(button_id); var button = $('#' + button_id), interval; new AjaxUpload(button, { action: '{{ route("upload.image") }}', name: 'file', onSubmit: function (file, ext) { button.text('Uploading'); this.disable(); interval = window.setInterval(function () { var text = button.text(); if (text.length < 13) { button.text(text + '.'); } else { button.text('Uploading'); } }, 200); }, onComplete: function (file, response) { console.log(response); this.enable(); button.html('Browse'); var obj = JSON.parse(response); if(obj.error) { alert(obj.error); } else { $('.image_name').val(obj.file); $('.img-holder-slider').html('<img src="{{url("/")}}/uploads/'+obj.file+'" style="max-width:100%;" />'); $('#toCrop').html('<img src="{{url("/")}}/uploads/'+obj.file+'" />'); $(".modal-dialog").css('width',obj.width+"px"); $('#toCrop img').Jcrop({ onSelect: showCoords, onChange: showCoords, setSelect: [ 0, 0, 0, 0 ], }); } window.clearInterval(interval); } }); } $(function() { initiate_ajax_upload('upload'); }) // When clicked Save in Modal $('#saveImage').click(function(){ $(this).text('Saving'); $(this).attr('disabled','disabled'); interval = window.setInterval(function () { var text = $(this).text(); if (text.length < 11) { $(this).text(text + '.'); } else { $(this).text('Saving'); } }, 200); $.ajax({ data:'x='+$('.x').val()+'&y='+$('.y').val()+'&w='+$('.w').val()+'&h='+$('.h').val()+'&file='+$('.image_name').val(), type:'post', url:'{{ route("crop.image") }}', success:function(response) { $('#saveImage').removeAttr('disabled'); $('#saveImage').html('Save Image'); $('#modal-default').modal('hide'); window.clearInterval(interval); $('.img-holder-slider').html('<img src="{{url("/")}}/uploads/cropped_'+$('.image_name').val()+'?rand='+Math.random()+'" />'); } }); }) |
Step 3 : Routes and Controllers.
We have to do three different task.
- Open index.blade.php in the browser.
- Save the image.
- Crop the saved image.
lets, write routes for those. Open up routes/web.php and write these code below :-
|
1 2 3 |
Route::get('/','AdminController@index'); Route::post('upload-image','AdminController@uploadImage')->name('upload.image'); Route::post('save-cropped-image','AdminController@saveCroppedImage')->name('crop.image'); |
Time to write the functions. Create new controller named AdminController.php and write these code below inside it.
– Function to browse index.blade.php.
|
1 2 3 |
public function index() { return view('index'); } |
– Function to save image.
|
1 2 3 4 5 6 7 8 9 10 11 12 13 14 15 16 17 18 19 20 21 22 23 |
public function uploadImage(Request $request){ $arr = []; if($request->hasFile('file')) { list($width, $height) = getimagesize($request->file); $arr['width'] = $width; $arr['height'] = $height; $arr['file'] = $request->file->getClientOriginalName(); if($width > 1000) { Image::make($request->file->getRealPath())->resize(1000,null, function($constraint){ $constraint->aspectRatio(); })->save(public_path('uploads/'.$arr['file'])); $arr['width'] = 1000; } else { Image::make($request->file->getRealPath())->save(public_path('uploads/'.$arr['file'])); } } else { $arr['error'] = "No Image Uploaded"; } echo json_encode($arr); } |
– Now the function to crop an image.
We have two functions to crop an image. Image will be either .jpg or .png,so you can use either of them or both of them depending on the result you want.
You might also want to use them both and wrap them inside if else statement, checking for file extension whether it is .jpg or .png image using getClientOriginalExtension() method. I have not done that in this tutorial. Take a look at the code below :-
|
1 2 3 4 5 6 7 8 9 10 11 12 13 14 15 16 17 18 19 20 21 22 23 24 25 26 27 28 29 30 |
public function saveCroppedImage(Request $request){ // Get The Necessary inputs $cin_crop_width = $request->w; $cin_crop_height = $request->h; $cin_crop_x_axis = $request->x; $cin_crop_y_axis = $request->y; $image_name = $request->file; // If you want to create a jpeg image header('Content-type: image/jpeg'); $jpeg_image_quality = 90; $source_image = public_path('uploads/'.$image_name); $cin_new_image = imagecreatefromjpeg($source_image); $cin_new_image_mirror = ImageCreateTrueColor( $cin_crop_width, $cin_crop_height ); imagecopyresampled($cin_new_image_mirror,$cin_new_image,0,0,$cin_crop_x_axis,$cin_crop_y_axis,$cin_crop_width, $cin_crop_height, $cin_crop_width, $cin_crop_height); $destination = public_path('uploads/'."cropped_".$image_name); imagejpeg($cin_new_image_mirror, $destination, $jpeg_image_quality); //If you want to create a png image header('Content-type: image/png'); $source_image = public_path('uploads/'.$image_name); $cin_new_image = imagecreatefrompng($source_image); $cin_new_image_mirror = ImageCreateTrueColor( $cin_crop_width, $cin_crop_height ); imagesavealpha($cin_new_image_mirror, TRUE); $empty = imagecolorallocatealpha($cin_new_image_mirror,0x00,0x00,0x00,127); imagefill($cin_new_image_mirror, 0, 0, $empty); imagecopyresampled($cin_new_image_mirror,$cin_new_image,0,0,$cin_crop_x_axis,$cin_crop_y_axis,$cin_crop_width, $cin_crop_height, $cin_crop_width, $cin_crop_height); $destination = public_path('uploads/'."cropped_".$image_name); imagepng($cin_new_image_mirror, $destination); } |
This is it. If you submit the form, the name of an original image is already set in hidden field in the form when you crop it so that you can easily save them in database.
You can change the settings in the JavaScript too if you want to match your own requirements.
You can see the demo by clicking here.
If you still have problem comment below or contact us via contact page from the website.
Leave a Reply