In this laravel 5.6 tutorial we are going to see how can we login, register and activate with username or email with all new features of laravel.
Recently i have written post on laravel 5.6 login with username or email tutorial which is very similar what we are going to do here. Make sure you at least read that posts to be more clear on what we are going to do here.
We are going to use inbuilt features of laravel 5.6 that helps in activation of email after signing up in the app. We will also send the confirmation link to the users email to activate their account.
Let’s get started,
What are we going to do ?
- Create fresh project of laravel app with default authentication scaffolding.
- Add new fields inside the users migration file and configure routes.
- Add new fields and constants inside
User.phpand add username field insideregister.blade.php. - Overriding default methods inside
RegisterController.phpand adding new methods. - Create new notification class to send notification to the user of creation of new account.
- Overriding default credentials method inside
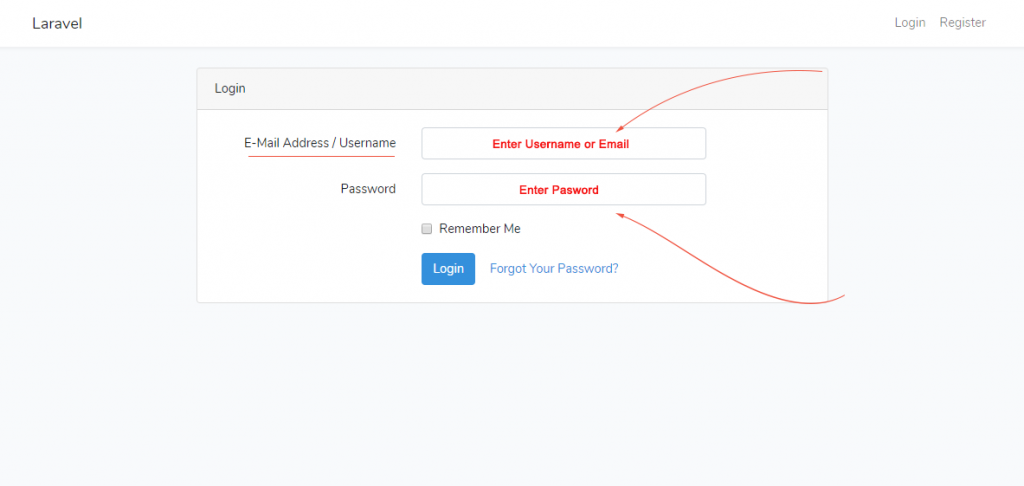
LoginController.phpto use username and email both for login.
Step 1 : Getting Fresh Project of Laravel Application with Auth Scaffolding
Create new project and open command line terminal in the project root and type php artisan make:auth to generate default authentication scaffolding.
If you take a look inside the resources/views folder inside your project root, new files would already have been created and new routes registered inside web.php of default authentication of laravel.
If you have already read my last post on using username and email both for login, this step can be skipped as its similar to that one.
Step 2 : Add new Fields Inside User Migration and Configure Routes
In this step we are going to add new fields that we require for this registration and activation process and configure routes.
The fields that we require in this database / migration are :-
- username = to save the username to the user (Must be unique and Nullable).
- token = Random token number that is used to require after to confirm the user via email.
- Active = To check the user if its active or have not confirmed the email yet and preventing them from login.
Lets modify the fields inside the migration. Inside public function up() add three new fields username, token and active. Take a look at the code below
|
1 2 3 4 5 6 7 8 9 10 11 12 13 14 |
public function up() { Schema::create('users', function (Blueprint $table) { $table->increments('id'); $table->string('name'); $table->string('username')->unique(); $table->string('email')->unique(); $table->string('password'); $table->string('token'); $table->integer('active')->default(0); $table->rememberToken(); $table->timestamps(); }); } |
Now, time to configure routes. Open web.php inside routes and add these line of code just below Auth::routes();
|
1 |
Route::get('complete-signup/{token}', 'Auth\RegisterController@activateAccount')->name('activate_account'); |
I believe that you have already configured your database inside project root inside .env file. If you already good to go, open command line terminal and hit php artisan migrate to get your new database ready with the users table inside it.
Step 3 : Add new fields and constants inside User.php and add username field inside register.blade.php
You can just copy and paste the existing email div and copy it and make changes in some fields to where necessary.
|
1 2 3 4 5 6 7 8 9 10 11 12 13 |
<div class="form-group row"> <label for="username" class="col-md-4 col-form-label text-md-right">{{ __('Username') }}</label> <div class="col-md-6"> <input id="username" type="text" class="form-control{{ $errors->has('username') ? ' is-invalid' : '' }}" name="username" value="{{ old('username') }}" required autofocus> @if ($errors->has('username')) <span class="invalid-feedback" role="alert"> <strong>{{ $errors->first('username') }}</strong> </span> @endif </div> </div> |
Step 4 : Overriding existing methods inside RegisterController.php and adding new methods.
In this step we are going to override some methods inside RegisterController.php and create new methods inside it.
Add username to the validator() function.
|
1 2 3 4 5 6 7 8 9 |
protected function validator(array $data) { return Validator::make($data, [ 'name' => 'required|string|max:255', 'email' => 'required|string|email|max:255|unique:users', 'password' => 'required|string|min:6|confirmed', 'username' => 'required|string|max:20|unique:users', ]); } |
Inside create function add username and token where token would be the random string of any length that you want. We can use str_random() function to generate the random length of string we want.
As you have seen $user->notify(new ActivateUser($user)); line is also added. This is where we create notification class and use it to send notification to user whenever they try register in your website.
Sounds Confusing ?? Bear with me now it would make sense later.
|
1 2 3 4 5 6 7 8 9 10 11 12 13 14 |
protected function create(array $data) { return User::create([ 'name' => $data['name'], 'email' => $data['email'], 'password' => Hash::make($data['password']), 'username' => $data['username'], 'token' => str_random(60) . time(), ]); $user->notify(new UserActivate($user)); return $user; } |
Now its time to override default register function of Auth to adjust according to our changes.
Add this code below the create function inside RegisterController.php
|
1 2 3 4 5 6 7 8 9 |
public function register(Request $request) { $this->validator($request->all())->validate(); event(new Registered($user = $this->create($request->all()))); return redirect()->route('login') ->with(['success' => 'An email with the confirmation link is sent to your email to complete your activation process.']); } |
Finally activateAccount which will get triggered once they click confirmation link in the email.
|
1 2 3 4 5 6 7 8 9 10 11 12 13 14 |
public function activateAccount($token = null) { $user = User::where('token', $token)->first(); if (empty($user)) { return redirect()->to('/') ->with(['error' => 'Your activation code is either expired or invalid.']); } $user->update(['token' => null, 'active' => User::ACTIVE]); return redirect()->route('login') ->with(['success' => 'Your Account is activated. Please Login']); } |
Finally your RegisterController.php class looks like this,
|
1 2 3 4 5 6 7 8 9 10 11 12 13 14 15 16 17 18 19 20 21 22 23 24 25 26 27 28 29 30 31 32 33 34 35 36 37 38 39 40 41 42 43 44 45 46 47 48 49 50 51 52 53 54 55 56 57 58 59 60 61 62 63 64 65 66 67 68 69 70 71 72 73 74 75 76 77 78 79 80 81 82 83 84 85 86 87 88 89 90 91 92 93 94 95 96 97 98 99 100 101 102 103 104 105 106 |
<?php namespace App\Http\Controllers\Auth; use App\User; use App\Http\Controllers\Controller; use Illuminate\Support\Facades\Hash; use Illuminate\Support\Facades\Validator; use Illuminate\Foundation\Auth\RegistersUsers; class RegisterController extends Controller { /* |-------------------------------------------------------------------------- | Register Controller |-------------------------------------------------------------------------- | | This controller handles the registration of new users as well as their | validation and creation. By default this controller uses a trait to | provide this functionality without requiring any additional code. | */ use RegistersUsers; /** * Where to redirect users after registration. * * @var string */ protected $redirectTo = '/home'; /** * Create a new controller instance. * * @return void */ public function __construct() { $this->middleware('guest'); } /** * Get a validator for an incoming registration request. * * @param array $data * @return \Illuminate\Contracts\Validation\Validator */ protected function validator(array $data) { return Validator::make($data, [ 'name' => 'required|string|max:255', 'email' => 'required|string|email|max:255|unique:users', 'password' => 'required|string|min:6|confirmed', 'username' => 'required|string|max:20|unique:users', ]); } /** * Create a new user instance after a valid registration. * * @param array $data * @return \App\User */ protected function create(array $data) { return User::create([ 'name' => $data['name'], 'email' => $data['email'], 'password' => Hash::make($data['password']), 'username' => $data['username'], 'token' => str_random(60) . time(), ]); $user->notify(new UserActivate($user)); return $user; } public function register(Request $request) { $this->validator($request->all())->validate(); event(new Registered($user = $this->create($request->all()))); return redirect()->route('login') ->with(['success' => 'An email with the confirmation link is sent to your email to complete your activation process.']); } public function activateAccount($token = null) { $user = User::where('token', $token)->first(); if (empty($user)) { return redirect()->to('/') ->with(['error' => 'Your activation code is either expired or invalid.']); } $user->update(['token' => null, 'active' => User::ACTIVE]); return redirect()->route('login') ->with(['success' => 'Your Account is activated. Please Login']); } } |
Now, its time to create the notification class that we just used inside create(); method inside RegisterController.php
Step 5 : Create new Notification Class to Send Notification to the User
Open command line terminal and hit php artisan make:notification UserActivate. It will create new notifications folder and UserActivate.php file inside app/notifications which would be our notification class.
Open UserActivate.php and add $this->user = $user inside the constructor.
|
1 2 3 |
public function __construct($user){ $this->user = $user; } |
Also, we will customize toMail($notifiable) function and customize the message that we want to show to user. Look at the code below and make changes as you need.
|
1 2 3 4 5 6 7 8 9 10 |
public function toMail($notifiable) { return (new MailMessage) ->from(env('ADMIN_MAIL_ADDRESS')) // or ->from("CustomEmailAddress@gmail.com") ->subject('Account activation at [Website Name]') ->greeting(sprintf('Hello, %s', $this->user->name)) ->line('It seems that you have just registered in our website. Click the link to activate your account.') ->action('Activate', route('activate_user',[$this->user->token])) ->line('Thank you for using our service!'); } |
Step 6 : Overriding Default Credentials Method Inside LoginController.php
Finally, in this step we are going to make some changes inside LoginController.php to use both email and username field for the login.
Open LoginController.php and add new method called credentials which will override the existing methods which is called from AuthentictesUsers trait but we are overriding it creating our own method inside LoginController.php.
Another function field will return both email and username field for the validateLogin(); to check the fields in the database.
We will also add validateLogin(); function which will validate if the username or email already exists in the database.
|
1 2 3 4 5 6 7 8 9 10 11 12 13 14 15 16 17 18 19 20 21 22 23 24 25 26 27 28 29 |
protected function credentials(Request $request) { $field = $this->field($request); return [ $field => $request->get($this->username()), 'password' => $request->get('password'), 'active' => User::ACTIVE, ]; } public function field(Request $request) { $email = $this->username(); return filter_var($request->get($email), FILTER_VALIDATE_EMAIL) ? $email : 'username'; } protected function validateLogin(Request $request) { $field = $this->field($request); $messages = ["{$this->username()}.exists" => 'User doesnot exists or disabled']; $this->validate($request, [ $this->username() => "required|exists:users,{$field},active," . User::ACTIVE, 'password' => 'required', ], $messages); } |
Finally, we are done. If you have any problem regarding login, register and activtion with username and email feel free to mention them via comments.
One more cool thing is that, laravel 5.7 which is released earlier have in build functionality for it. If you want to learn how to use username and email for authentication in laravel 5.7 you can click this link.
Leave a Reply