Today in this article I am going to create drop and drop navigation menu in laravel.
I am using laravel 5.3 in this posts, but it doesn’t matter since everything works fine with all versions of laravel.
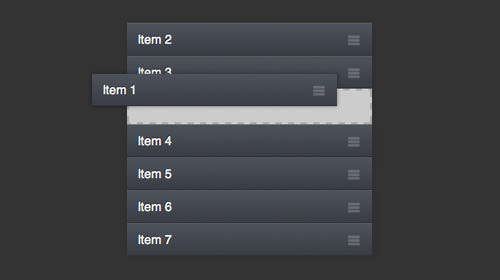
As you can see in above image we can drag and drop and order menu anywhere you like, it is very easy for clients to manage their navigation menu wherever they want to display.
What you are going to learn ?
- How to create menus in Laravel
- How to order them using jQuery sortable function.
Lets, get started
First thing first, you need to create two views as named below in your /resources/views folder
- menuManage.blade.php
- menu.blade.php
|
1 2 3 4 5 6 7 8 9 10 11 12 13 14 15 16 17 18 19 20 21 22 23 24 25 26 27 28 29 30 31 32 33 34 35 36 37 38 39 40 41 42 43 44 45 46 47 48 49 50 51 52 53 54 55 56 57 58 |
<script src="https://ajax.googleapis.com/ajax/libs/jquery/3.1.1/jquery.min.js"></script> <script src="https://ajax.googleapis.com/ajax/libs/jqueryui/1.12.1/jquery-ui.min.js"></script> <script> $(function(){ $("#menu").sortable({ stop: function(){ $.map($(this).find('li'), function(el) { var itemID = el.id; var itemIndex = $(el).index(); $.ajax({ url:'{{URL::to("order-menu")}}', type:'GET', dataType:'json', data: {itemID:itemID, itemIndex: itemIndex}, }) }); } }); }); </script> <style> #menu { padding: 0px; } #menu li { list-style: none; margin-bottom: 10px; border: 1px solid #d4d4d4; -webkit-border-radius: 3px; -moz-border-radius: 3px; border-radius: 3px; border-color: #D4D4D4 #D4D4D4 #BCBCBC; padding: 6px; cursor: move; background: #f6f6f6; background: -moz-linear-gradient(top, #ffffff 0%, #f6f6f6 47%, #ededed 100%); background: -webkit-gradient(linear, left top, left bottom, color-stop(0%,#ffffff), color-stop(47%,#f6f6f6), color-stop(100%,#ededed)); background: -webkit-linear-gradient(top, #ffffff 0%,#f6f6f6 47%,#ededed 100%); background: -o-linear-gradient(top, #ffffff 0%,#f6f6f6 47%,#ededed 100%); background: -ms-linear-gradient(top, #ffffff 0%,#f6f6f6 47%,#ededed 100%); background: linear-gradient(to bottom, #ffffff 0%,#f6f6f6 47%,#ededed 100%); filter: progid:DXImageTransform.Microsoft.gradient( startColorstr='#ffffff', endColorstr='#ededed',GradientType=0 ); } </style> <div class="box-body table-responsive"> @if(isset($menus)) @if(count($menus) > 0) <ul id="menu" class="sortable"> @foreach($menus as $menu) <li id="{{$menu->menu_id}}"> <a>{{$menu->title}}</a> </li> @endforeach </ul> @endif @endif </div> |
|
1 2 3 4 5 6 7 8 9 10 11 12 13 14 |
<!-- Latest compiled and minified CSS --> <link rel="stylesheet" href="https://maxcdn.bootstrapcdn.com/bootstrap/3.3.7/css/bootstrap.min.css" /> <!-- Optional theme --> <link rel="stylesheet" href="https://maxcdn.bootstrapcdn.com/bootstrap/3.3.7/css/bootstrap-theme.min.css" /> <!-- Latest compiled and minified JavaScript --> <script src="https://maxcdn.bootstrapcdn.com/bootstrap/3.3.7/js/bootstrap.min.js"></script> <ul> @foreach($menus as $menu) <li>{{$menu->title}}</li> @endforeach </ul> |
Now to create database and a table named tbl_menus where we will have menu_id, title and order field. Take a look at image below on how it should look. Later you can customize the way you want.

Now, lets create table and fields using laravel artisan command. Go to commandline and type php artisan make:model tbl_menu -m. This will create a model in app folder and migration file in app/database/migrations folder.
If you are new to laravel you can view its documentation at laravel official website here. Here is the copy of my migration file how it looks.
|
1 2 3 4 5 6 7 8 9 10 11 12 13 14 15 16 17 18 19 20 21 22 23 24 25 26 27 28 29 30 31 32 33 |
<?php use Illuminate\Support\Facades\Schema; use Illuminate\Database\Schema\Blueprint; use Illuminate\Database\Migrations\Migration; class CreateTblMenusTable extends Migration { /** * Run the migrations. * * @return void */ public function up() { Schema::create('tbl_menus', function (Blueprint $table) { $table->increments('menu_id'); $table->string('title'); $table->integer('order'); $table->timestamps(); }); } /** * Reverse the migrations. * * @return void */ public function down() { Schema::dropIfExists('tbl_menus'); } } |
Now, its time to give a table name to model and assign a primary key.
Laravel by default assigns id as its primary key but if you want to specify custom primary key, you need to specify it in a model like below.
Open your model by going to App/tbl_menu.php inside your application folder.
|
1 2 3 4 5 6 7 8 9 10 11 |
<?php namespace App; use Illuminate\Database\Eloquent\Model; class tbl_menu extends Model { protected $table = 'tbl_menus'; protected $primaryKey = 'menu_id'; } |
Now again go to command-line console and type php artisan migrate:refresh to crate the table and fields.
Now, time to setup routes. Go to Application/routes/web.php and insert these codes to setup routes and functions.
|
1 2 3 4 5 6 7 8 9 10 11 12 13 14 15 16 17 18 19 20 21 22 23 24 25 26 27 |
<?php use Illuminate\Support\Facades\Input; // function to view menu which are in order Route::get('/', function () { $menu = DB::table('tbl_menus')->orderBy('order','ASC')->get(); return view('menu',['menus'=>$menu]); }); // To view Menu That are in database Route::get('managemenu',function(){ $menu = DB::table('tbl_menus')->orderBy('order','ASC')->get(); return view('menuManage',['menus'=>$menu]); }); // Function to order menus Route::get('order-menu',function(){ $menu = DB::table('tbl_menus')->orderBy('order','ASC')->get(); $itemID = Input::get('itemID'); $itemIndex = Input::get('itemIndex'); foreach($menu as $value){ return DB::table('tbl_menus')->where('menu_id','=',$itemID)->update(array('order'=> $itemIndex)); } }); |
After, this we need to add some data into tables. Go to http://localhost/phpmyadmin and your database and table named tbl_menus and add some data.
Then, hover over to the browser again and to URL : http://localhost/yourapp/managemenu and drag and drop the menus.
To see the effect and change go back to url where we have setup routes at URL : http://localhost/yourapp/menumanage.
Try Drag and Drop the Menus in different place and see if it works. If you have followed this tutorial correctly it would have worked.
If you still have problem, you can leave your problem in comments.
Leave a Reply